Replicating Elastic File System With AWS DataSync

I recently used AWS DataSync as part of a lab I was building. These are my notes for using DataSync to replicate an Amazon Elastic File System (EFS) share from one region to another.
AWS DataSync is a managed service that enables replication of data between AWS services and from on-prem to AWS. It automates the scheduling of transfer activities, validates copied data, and uses a purpose-built network protocol and multi-threaded architecture to achieve very high efficiency on the wire.
The use case I needed to tackle was replicating an Amazon EFS share in one region to an EFS share in a different region (a one-way replication). (DataSync can also connect to Amazon S3 and Amazon FSx for Windows File Server)
Deploy the agent⌗
DataSync relies on a software agent to pull data off the source EFS share. Since the source share is already on AWS, the agent will be deployed to Amazon EC2. If the source share was on-prem, the agent can be installed as a VM on-prem. The DataSync documentation explains the requirements for both a VM and EC2 deployment. Notably for EC2, the instance size must be "at least 2xlarge".
The DataSync documentation has a list of Amazon Machine Images (AMIs) that can be used to launch the agent on EC2. When launching an EC2 instance, you can search for one of the AMI IDs listed in the docs or you can use the "Launch instance" link within the documentation to straight away go into launching the chosen AMI.
For a programmatic approach, you can query the Amazon Systems
Manager (SSM) parameter
/aws/service/datasync/ami to get the latest DataSync agent AMI ID. For
example, using the AWS CLI:
aws ssm get-parameter --name /aws/service/datasync/ami --region <region>
When deploying the agent on EC2, deploy it into the same region as the source EFS share.
Note that you will need to connect to the agent on TCP port 80 via your browser in order to activate the agent. Ensure all security groups and access control lists allow this communication.
While you're looking at security groups, ensure the agent is permitted by the source EFS share's security group(s) so that the agent can mount the share.
Activate the agent⌗
With the agent installed, it's necessary to activate the agent which is the process of registering the agent with your AWS account.
Perform the activation in the same region as the destination EFS share.
- In the AWS Console, navigate to DataSync > Agents > Create agent.
- Choose the type of endpoint you want to use for the agent to talk to DataSync. Because I'm syncing data across regions, I chose public endpoint. For more information about endpoints, see the DataSync documentation.
- In the
Agent addressbox, enter the IP address of the agent.
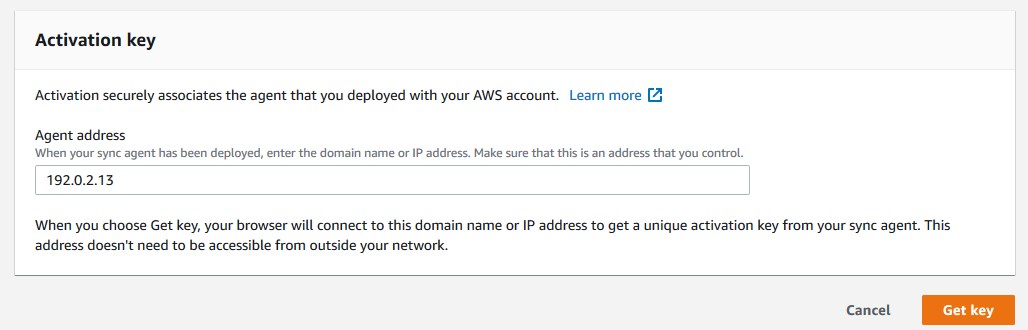
When you click the Get key button, the browser will redirect to the agent
address on port 80 and activate the agent. Activation is a necessary step so if
you don't have connectivity from your browser to the agent.... well, you're
kinda hosed. Either open up the security group to allow access, or SSH tunnel
through a jump box, or find some other trickery to make it work.
Create locations⌗
A "location" in DataSync refers to a place to either pull data from or put data into. In the DataSync console, click Locations > Create location.
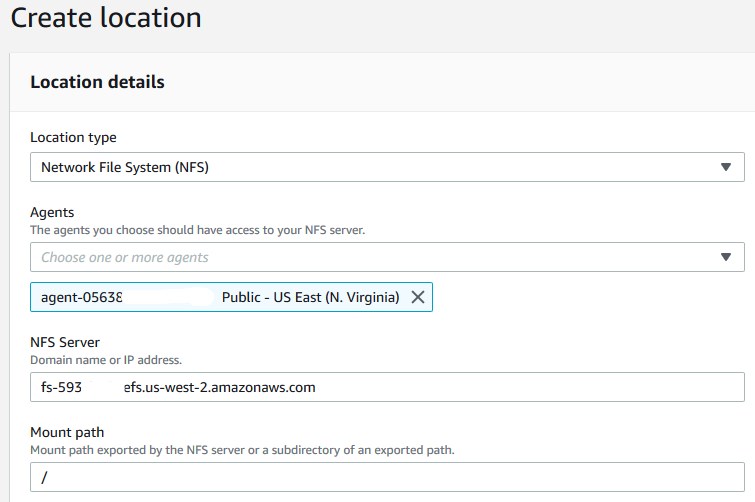
For the source location, as per the DataSync
documentation,
create it with a type of Network File System (even though EFS also shows up
as an available option).
- Select the agent from the drop down
- Enter the EFS DNS name in the
NFS Serverbox (find this by looking at the EFS share in the source region) - Enter the mount path (
/for the entire share)
Create the location.
Repeat the above steps for the destination location.
- Location type is
EFSthis time - Choose your file system from the drop down
- Enter the mount path
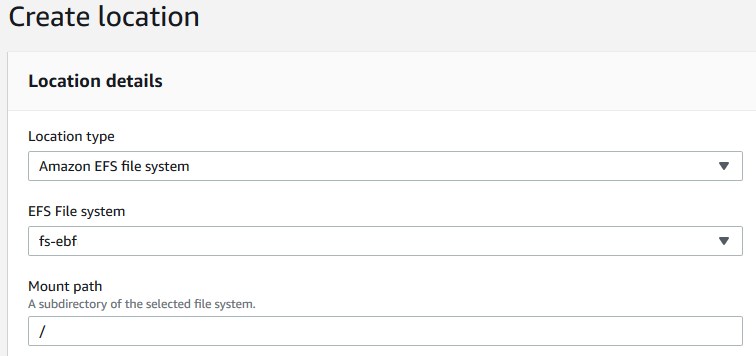
- Expand
Additional settings- DataSync automatically chooses a subnet and security group. Examine the security group in particular and ensure that the SG(s) selected will allow the agent to communicate with the EFS share. Refer to the DataSync documentation for more details.
A location is not inherently a source or a destination; it's how the location is used in a sync task that makes it a source or destination.
Configure a task⌗
A task defines what should be synchronized to where and at what frequency.
In the DataSync console, browse to Tasks > Create task.
- For the source, select
Choose an existing locationand pick theNFSlocation from the drop down - For the destination, select
Choose an existing locationand pick theEFSlocation from the drop down - Give the task a name
- Review and modify the task options per your requirements. Refer to the DataSync documentation for information about the options.
- Select a schedule (or leave it unscheduled to trigger the task manually)
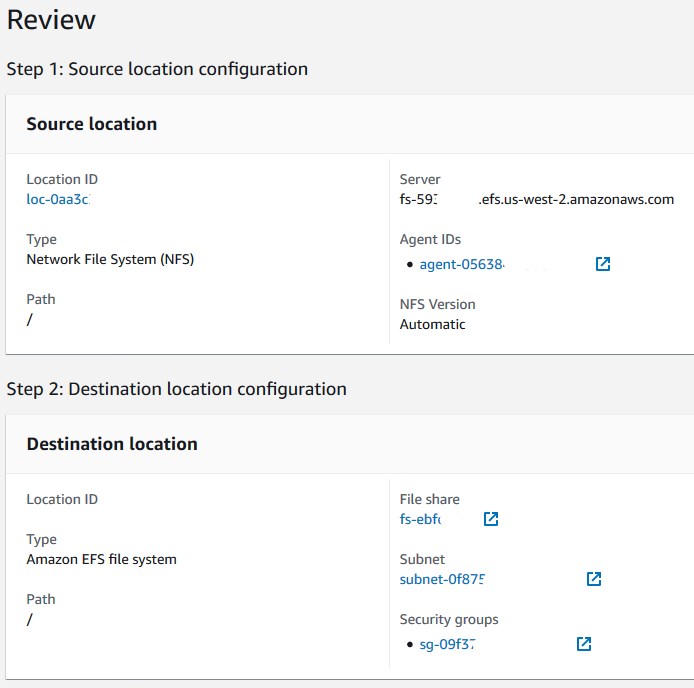
Review the task configuration and click Create task.
Viewing task status⌗
The status and/or history of a sync task can be viewed by clicking on the
task-id in the list of tasks and then on the History tab. You can also
immediately trigger the task to run by clicking on the Start button when
viewing the task.
Disclaimer: The opinions and information expressed in this blog article are my own and not necessarily those of Amazon Web Services or Amazon, Inc.